In the last year or so I’ve found it would be useful to have a quick setup for doing a blue screen. A lot of my website clients have a need to record some video to be overlayed on top of pictures or video, so I decided to try several different lighting techniques to get the best results when trying to key out a solid colour from video.
The “key” is to get even light on the background so that the colour is uniform enough for the software to pull it out without affecting the rest of the video. Being able to properly expose your foreground and background is pretty important too, so being able to manually adjust the exposure of your camera makes things a lot easier. For my Canon Rebel T1i, I don’t have the ability to manually set the exposure, so it makes things a little bit more complicated. It means that I have to have the lighting on the subject about the same intensity as the lighting on the background.
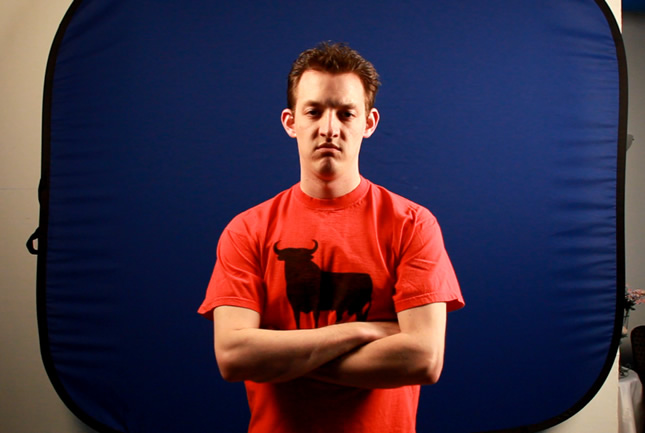
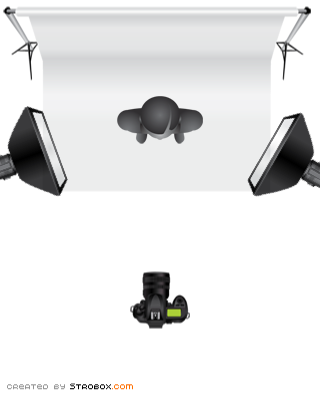
This is one of the setups I did. It works ok, and the lighting works for what I’m doing in the video (looking menacing towards the camera), but it’s not ideal for regular use. The shadow down the middle of my face kinda works for this video. Here is the lighting diagram:
Because of the limited room on the lighting diagram window, the soft boxes look like they are closer to the subject than they actually are. In fact, they were about 6 feet away. They were above the subject and pointing down to minimize shadows on the background, and each had a 500w light shining inside it.
Camp Morice is a youth camp that I volunteer at every summer. It’s in Fort St James, BC and boasts some of the most amazing sunsets you will ever see. One of the activities that is played every week is Capture the Flag (or CTF). The Red vs Green rivalry has been going strong since before I was born….so naturally there is lots of smack talk back and forth. This leads to the idea for my test video:
So that’s it for now. I hope to try a few more setups to see what works best. Hopefully that means more test videos as well.


